今天尝试了下往vue创建的增加了根目录的demo增加vue-router和vuex插件。分别执行了npm install vue-router 和npm install vuex。
在src/main.js中添加引入这两个插件,并按照https://router.vuejs.org/zh/guide/#html 和 https://vuex.vuejs.org/zh/guide/中写的加入部分内容。
import Vue from 'vue'
import App from './App.vue'
import VueRouter from 'vue-router' //引入router
import Vuex from 'vuex'	//引入vuex

Vue.config.productionTip = false;

//-----------------------------------------增加的部分
Vue.use(VueRouter);	//导入vue-router
Vue.use(Vuex);	//导入vuex

// 1. 定义 (路由) 组件。
// 可以从其他文件 import 进来 类似 import page from 'page.vue'
const Foo = { template: '<div>foo</div>' };
const Bar = { template: '<div>bar</div>' };
// 2. 定义路由
// 每个路由应该映射一个组件。 其中"component" 可以是
// 通过 Vue.extend() 创建的组件构造器,
// 或者,只是一个组件配置对象。
const routes = [
  { path: '/foo', component: Foo },
  { path: '/bar', component: Bar }
]
// 3. 创建 router 实例,然后传 `routes` 配置
// 你还可以传别的配置参数, 不过先这么简单着吧。
const router = new VueRouter({
  routes // (缩写) 相当于 routes: routes
});

//vuex store
const store = new Vuex.Store({
  state: {
    count: 0
  },
  mutations: {
    increment (state) {
      state.count++
    }
  }
})

//-----------------------------------------结束增加的部分
new Vue({
  render: h => h(App),
  router:router, //增加router对象
  store:store    //增加store对象
}).$mount('#app');
在src/App.vue中加入部分内容。
<template>
  <div id="app">
    <img alt="Vue logo" src="./assets/logo.png">
    <HelloWorld msg="Welcome to Your Vue.js App"/>
<!-- 增加部分 -->
    <div>这是计数{{count}}</div>
    <p>
    <!-- 使用 router-link 组件来导航. -->
    <!-- 通过传入 `to` 属性指定链接. -->
    <!-- <router-link> 默认会被渲染成一个 `<a>` 标签 -->
    <router-link to="/foo">Go to Foo</router-link>
    <router-link to="/bar">Go to Bar</router-link>
  </p>
  <!-- 路由出口 -->
  <!-- 路由匹配到的组件将渲染在这里 -->
  <router-view></router-view>
<!-- 结束增加部分 -->
  </div>
</template>

<script>
import HelloWorld from './components/HelloWorld.vue'

export default {
  name: 'App',
  components: {
    HelloWorld
  },
  data(){
   return {
	count:this.$store.state.count //赋予计数器的值
   };
  }
}
</script>

<style>
#app {
  font-family: Avenir, Helvetica, Arial, sans-serif;
  -webkit-font-smoothing: antialiased;
  -moz-osx-font-smoothing: grayscale;
  text-align: center;
  color: #2c3e50;
  margin-top: 60px;
}
</style>
修改完后,开始执行npm run build 构建项目。没有错误后,执行dist/index.html。

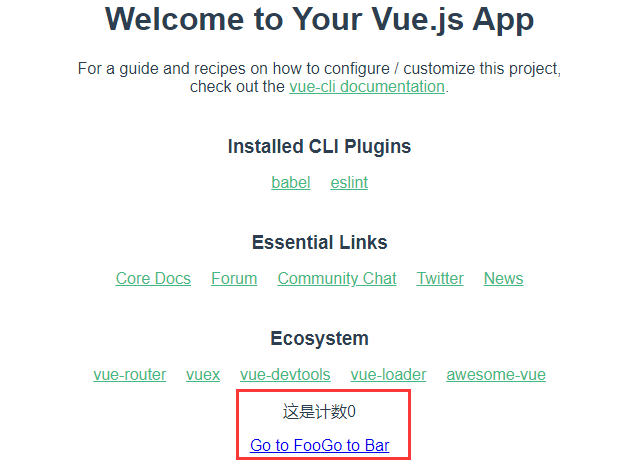
我们增加的东西都在这里了。点一下go to foo ,竟然没反映。看了下dom树,出现

<!--function(e,n,r,o){return ln(t,e,n,r,o,!0)}-->
经过测试,和百度谷歌了一波,理论上这是控件没加载成功的输出。
<!DOCTYPE html><html>
<head><meta charset=utf-8><meta http-equiv=X-UA-Compatible content="IE=edge">
<meta name=viewport content="width=device-width,initial-scale=1">
<link rel=icon href=favicon.ico><title>demo</title>

</head><body>

<script src="https://unpkg.com/vue/dist/vue.js"></script>
<script src="https://unpkg.com/vue-router/dist/vue-router.js"></script>

<div id="app">
  <h1>Hello App!</h1>
  <p>
    <!-- use router-link component for navigation. -->
    <!-- specify the link by passing the `to` prop. -->
    <!-- <router-link> will be rendered as an `<a>` tag by default -->
    <router-link to="/foo">Go to Foo</router-link>
    <router-link to="/bar">Go to Bar</router-link>
    <router-link to="/bar2">Go to Bar2</router-link>
  </p>
  <!-- route outlet -->
  <!-- component matched by the route will render here -->
  <router-view></router-view>
</div>
<script>
// 0. If using a module system, call Vue.use(VueRouter)

// 1. Define route components.
// These can be imported from other files
const Foo = { template: '<div>foo</div>' }
const Bar = { template: '<div>bar</div>' }
const Bar2 = { template: '<div>bar2</div>' }
// 2. Define some routes
// Each route should map to a component. The "component" can
// either be an actual component constructor created via
// Vue.extend(), or just a component options object.
// We'll talk about nested routes later.
const routes = [
  { path: '/foo', component: Foo },
  { path: '/bar', component: Bar },
  { path: '/bar2', component: Bar2 }
]

// 3. Create the router instance and pass the `routes` option
// You can pass in additional options here, but let's
// keep it simple for now.
const router = new VueRouter({
  routes
})

// 4. Create and mount the root instance.
// Make sure to inject the router with the router option to make the
// whole app router-aware.
const app = new Vue({
  router
}).$mount('#app')

// Now the app has started!
</script>
</body></html>
我单独一个html这种方式引入使用,是正常显示的。
我试着把foo和bar通过.vue文件引入,再构建。
//main.js
import Vue from 'vue';
import App from './App.vue';
import VueRouter from 'vue-router'; //引入router
import Vuex from 'vuex';	//引入vuex
import Foo from './view/foo.vue';
import Bar from './view/bar.vue';
Vue.config.productionTip = false;

//-----------------------------------------增加的部分
Vue.use(VueRouter);	//导入vue-router
Vue.use(Vuex);	//导入vuex

// 1. 定义 (路由) 组件。
// 可以从其他文件 import 进来 类似 import page from 'page.vue'
//const Foo = { template: '<div>foo</div>' };  //这里注释掉定义
//const Bar = { template: '<div>bar</div>' };  //这里注释掉定义
// 2. 定义路由
// 每个路由应该映射一个组件。 其中"component" 可以是
// 通过 Vue.extend() 创建的组件构造器,
// 或者,只是一个组件配置对象。
const routes = [
  { path: '/foo', component: Foo },
  { path: '/bar', component: Bar }
]
// 3. 创建 router 实例,然后传 `routes` 配置
// 你还可以传别的配置参数, 不过先这么简单着吧。
const router = new VueRouter({
  routes:routes // (缩写) 相当于 routes: routes
});
//console.log(router);
//vuex store
const store = new Vuex.Store({
  state: {
    count: 0
  },
  mutations: {
    increment (state) {
      state.count++
    }
  }
})

//-----------------------------------------结束增加的部分
new Vue({
  render: h => h(App),
  router:router, //增加router对象
  store:store    //增加store对象
}).$mount('#app');
//foo.vue bar.vue
<template>
<div>this is foo/bar</div>
</template>
<script>
export default {
name: 'Index'
}
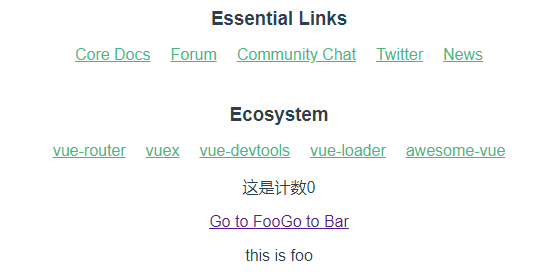
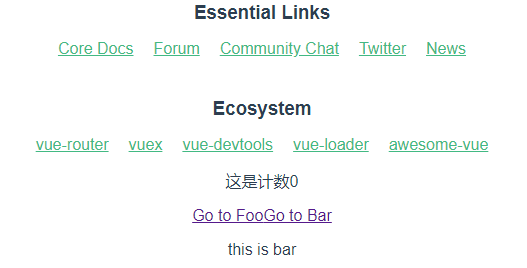
</script> 再构建,正常显示了。


